Showing posts with label Photoshop. Show all posts

STRING LIGHT (Part 3)

Continuation of part 2...

1. Next press ctrl + J, it will create a new layer above layer 0. Name the new layer with the name of copy.
2. Now we will make bubbles using Brush. Use Brush with 60px size. Each bubble we give different sizes, in order to look beautiful.
3. Add a new layer below the layer copy by selecting create a new layer. The new layer Make bubbles with a predetermined size Brush. In the foreground choose the color pink.

Light string - korean actress

4. If you've like this, now duplicate copy of the white light, cahaya putih copy 2, and cahaya putih 3  by pressing ctrl + J.

all layer
all layer


5. In the light layer of white copy, select filters > Blur > Motion Blur, distance = 20; Angle = -48 > OK.


Effect - motion blur
6. Duplicate the layer gelembung by pressing ctrl + J.
7. Activate the layer gelembung and select > Blur > Motion Blur filter, distance = 50; angle = 45;.
8. Next select layer benang pink3, press Ctrl + E to unify the layers. Draw up a layer cahaya putih.

select layer - cahaya putih

9. Turn on the cahaya putih and then select the Erase Tool (E) and remove this section:

select - erase tools

10.  Add a new layer above layer cahaya putih  (select create a new layer).
11. Use the brush size between 1px - 10px. In the foreground select the color white.

Result
Result
12. Finish... 

Photoshop Tutorial || Master of Photoshop

STRING LIGHT (Part 2)

Next to part 2..

1. Now set the size of the brush to be used, for example by 3px.
2. Press right click on the image then select Stroke path > OK.


The results are as follows:

string light part 2
string light part 2

3. Add a new layer below the layer 1, select create a new layer.
4. In the foreground choose the color white. Use the direct selection tool > and right-click on the line vector > select stroke path > OK, do not forget to specify the size of the previous brush, roughly 5px

5. Keep using the direct selection tool (A), then add a new layer above the layer 1 by selecting create a new layer.

Change the shape of its vector lines like this :

actress korean - light string

6. Now specify resize brush be 1px, and the color is dark pink foreground / pink little old.

Foreground color
Foreground color


7. Right-click on the vector and then select stroke path > OK

create stroke path
create stroke path
8. If it is as above the next step is to do the same as in step No. 3, 4, and 5.
9. Make it like this :
all layer
all layer

   Result :


duplicate layer-string


10. To remove its vector, select the direct selection tool (A) > click right to delete > select vector line path.

11. Next is to select cahaya putih3 and press ctrl + J on keboard to duplicate.
layer -  cahaya putih3 copy
layer -  cahaya putih3 copy

12.  Next do the same thing to the next layer, the second layer of "cahaya putih".

select - cahaya putih

13. If you've followed the steps above results will look more bright white light.
14. Now switch on a cahaya putih copy, then select > Blur > Gaussian Blur filter. The value of the radius is 3.0 px > OK.

gaussian blur
gaussian blur
  

15. Continue with step No. 14, did the layer cahaya putih 2 and layer cahaya putih 3.
16. If it is the next step is to add a new layer below the layer 0, select create a new layer to add a new layer.
  
17. In layer 1 (new layer) named layer gelembung.
18. Activate the layer 0 > piliih Quick selection tool (W) / or can also use the Magic Wand Tool (W) > size be 40px. 

19. Do it like this by using the Quick selection tool.

Quick selection tool


 ~ To Be Continue ... part 3


ADOBE PHOTOSHOP || MASTER OF PHOTOSHOP

YARN LIGHT (Part 1)

1. Open Photoshop cs
2. Select File --> Open (ctrl+O) --> file image.
3. Suppose the image you opened is like this.


4. Click 2x on layer 0, select OK. This was done in order to sign a lock is lost.
5. Select the Pen Tool in the Toolbar.
6. Add a new layer above the layer 0, select create a new layer.
7. If you've added will be created layer 1, layer 1 we will create a line vector using the Pen Tool.

AKANE SOUMA into CARTOON : Adobe Photoshop cs 3 (PART 5)


Continuation .. .

1. Still in
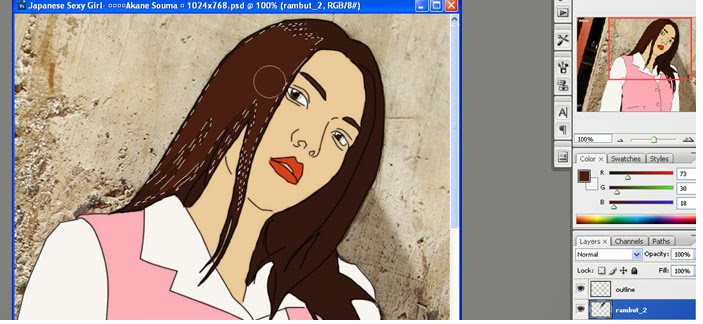
the selection condition of the Pen tool, the next to the next stage. Select the Direct Selection tool, right-click on the selection area of the pen tool. Select Make selection.


- The shape of the Make Selection


2. Still in conditions Make Selection, next to the coloring stage. Select the Brush tool, and color selection area.  


AKANE SOUMA into CARTOON : Adobe Photoshop cs 3 (PART 4)

Next ...

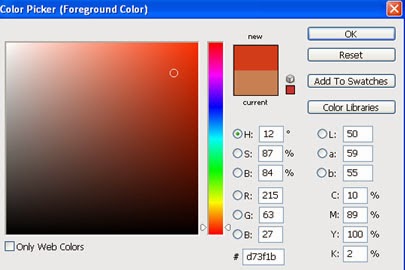
1. Choose a blush color for lips Ayane
.


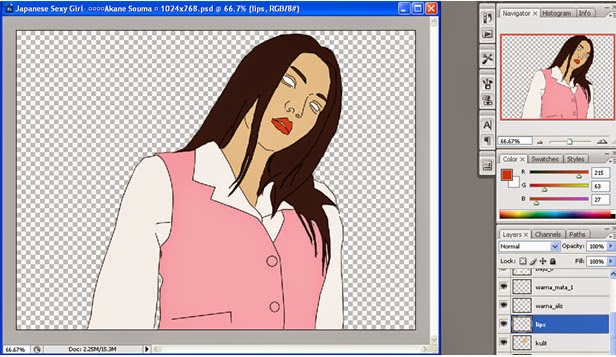
2. Coloring lips on lips layer using the Brush tool.


3. Then make eyeball to Ayane. Add a new layer above the layer warna_mata_1, name the layer bola_mata.

4. Select the appropriate color for the eye Ayane. Paint the eyes Ayane in bola_mata layer using the Brush tool.

AKANE SOUMA into CARTOON : Adobe Flash cs 3 (PART 3)

Next part 3 :


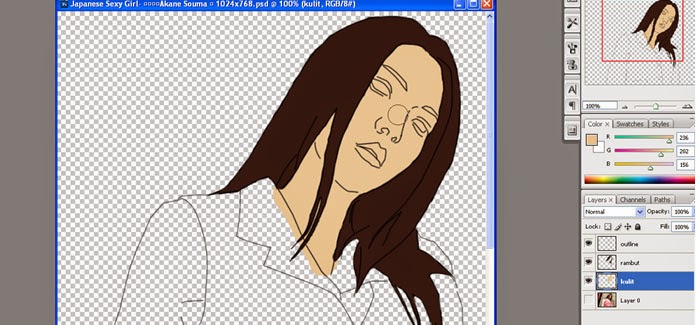
1. After coloring the skin of Akane Souma, then add a layer on the skin and name is baju_1.

2. Take a sample of the color of clothes Akane Souma colored Pink (pink) by using the eyedropper tool.